Step 17: Install back cover and feet
When every key works (Step 16):
- Screw on the back cover with 7 M3 6 mm screws per side.
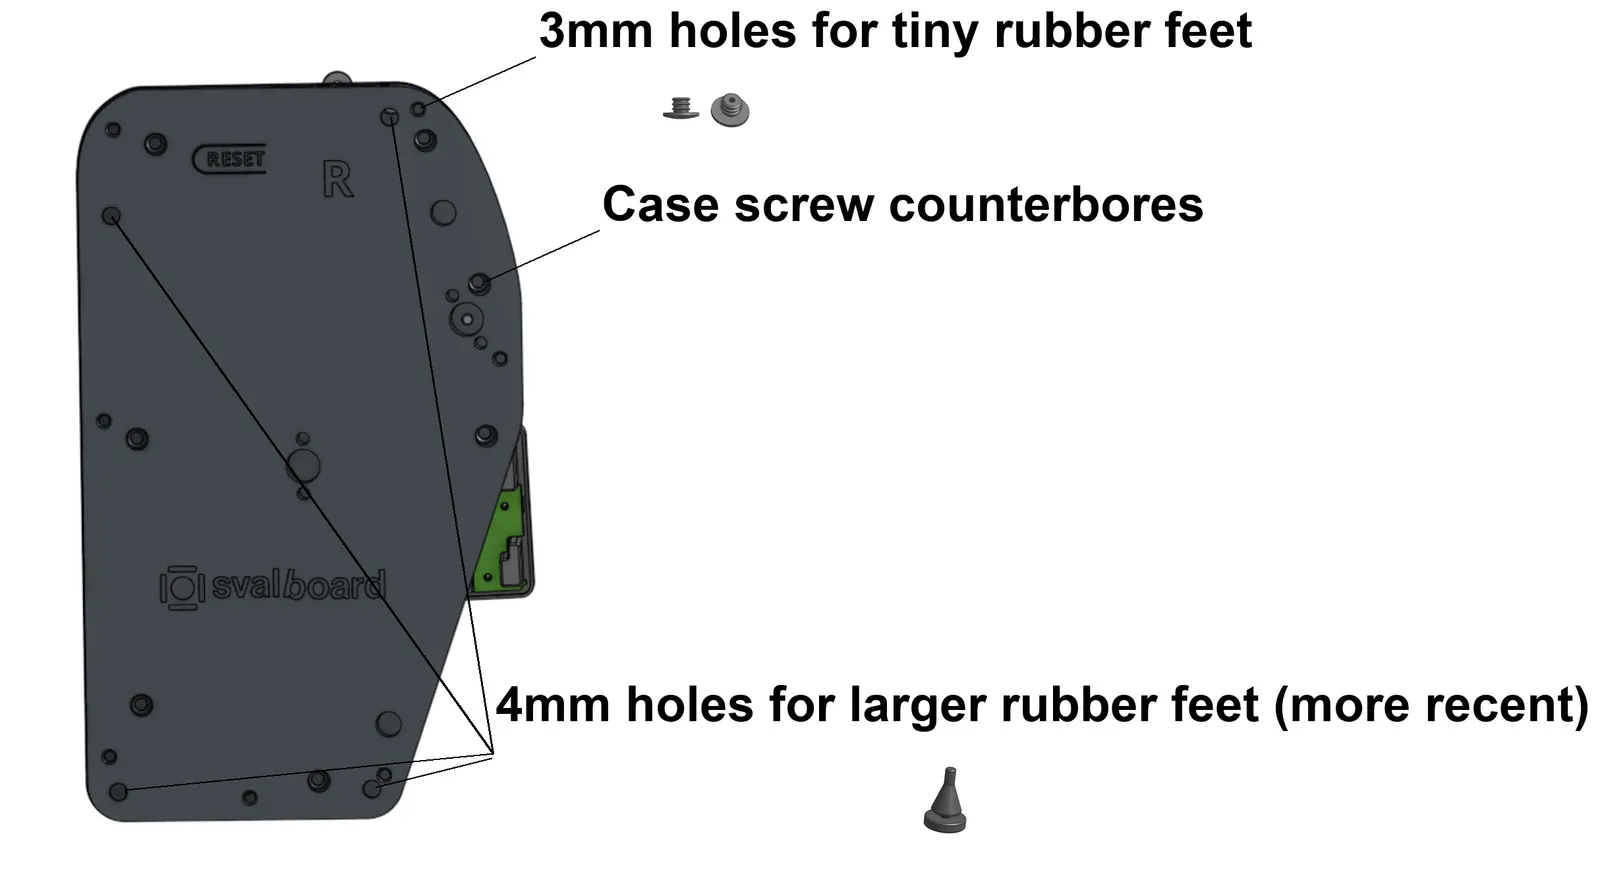
- Add 4 rubber feet per side, in the holes closest to the four corners.
- Trim the feet on the thin side of the case, so they don’t press against the base plate and deform it. Leave enough material that they stay in place.
If the board rocks, shave the bottoms of the feet with a craft knife. The silicone is very soft and easy to trim. You can also work on reducing warping in your prints.
Feet sizes
Section titled “Feet sizes”- Recent cases have 4 mm holes for the larger rubber feet.
- Case version 1.2.6 and later also fit the small plug feet: 6 mm across, about 3 mm long, in soft 70A silicone. They lower the stack by more than a millimeter. On an older case, drill 3 mm holes to fit them.