Step 12: Install MCUs
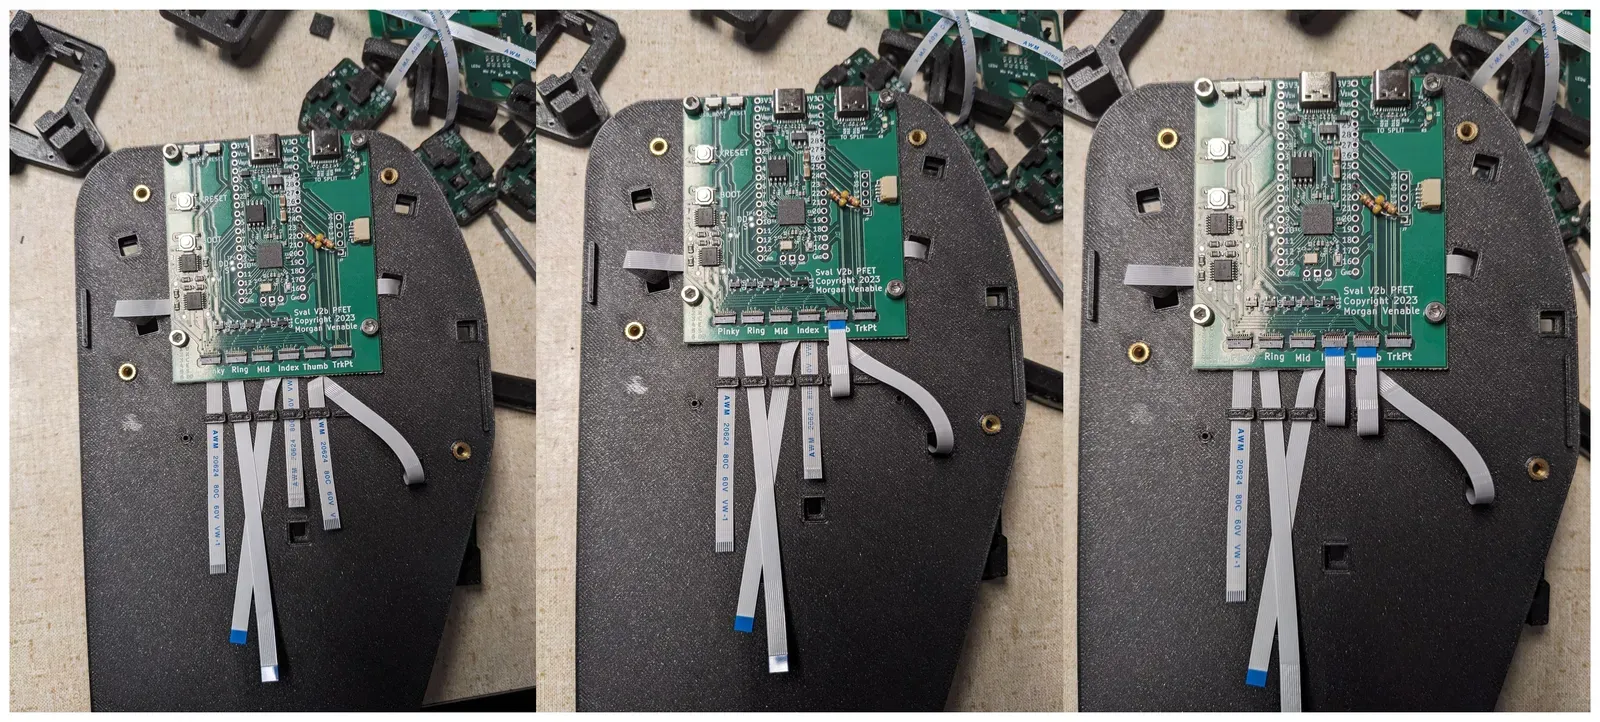
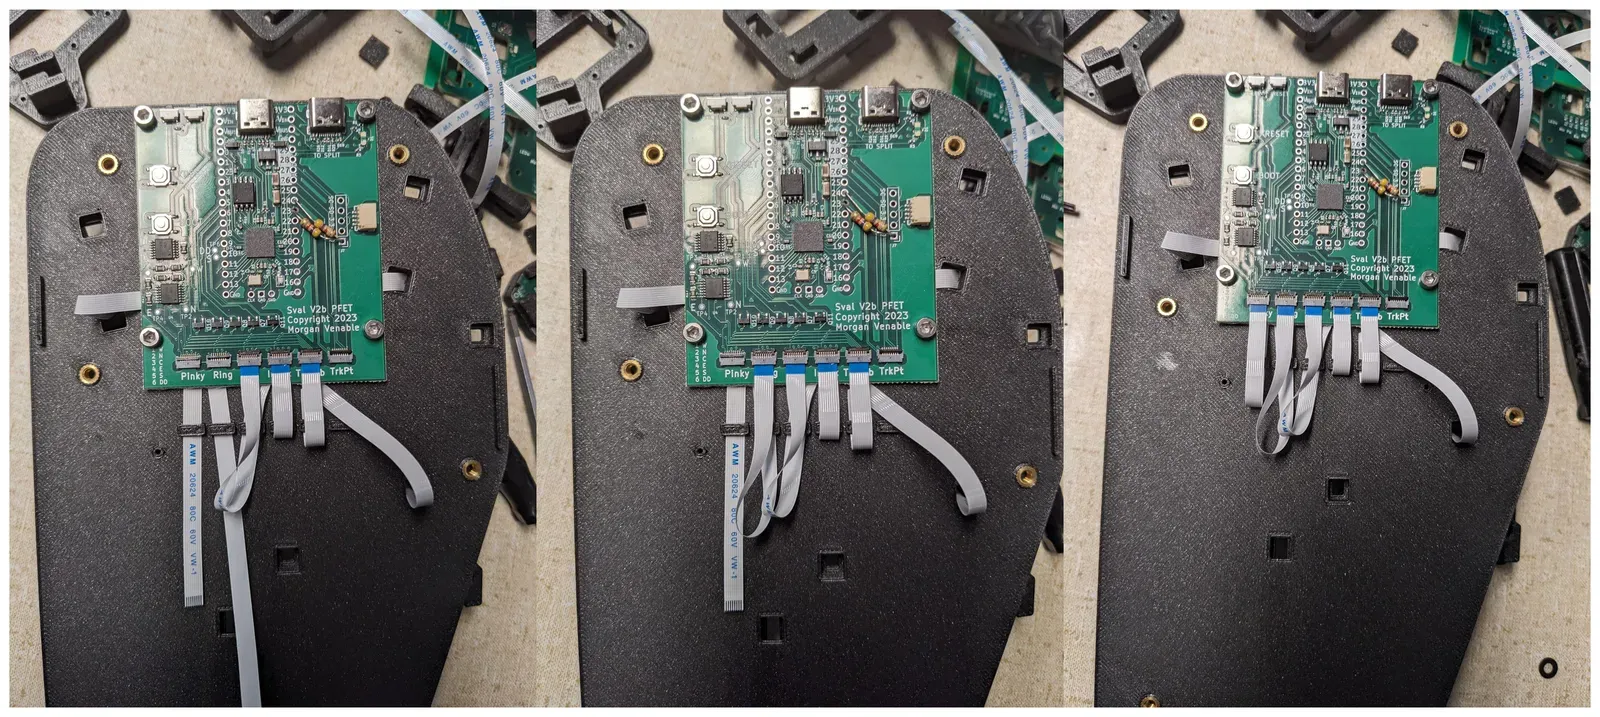
Screw the MCU (the main PCBA) to the base plate with the M3 6 mm thread-cutting screws. Then connect each FFC to its connector.
- The black latches on the connectors flip up to open and down to close.
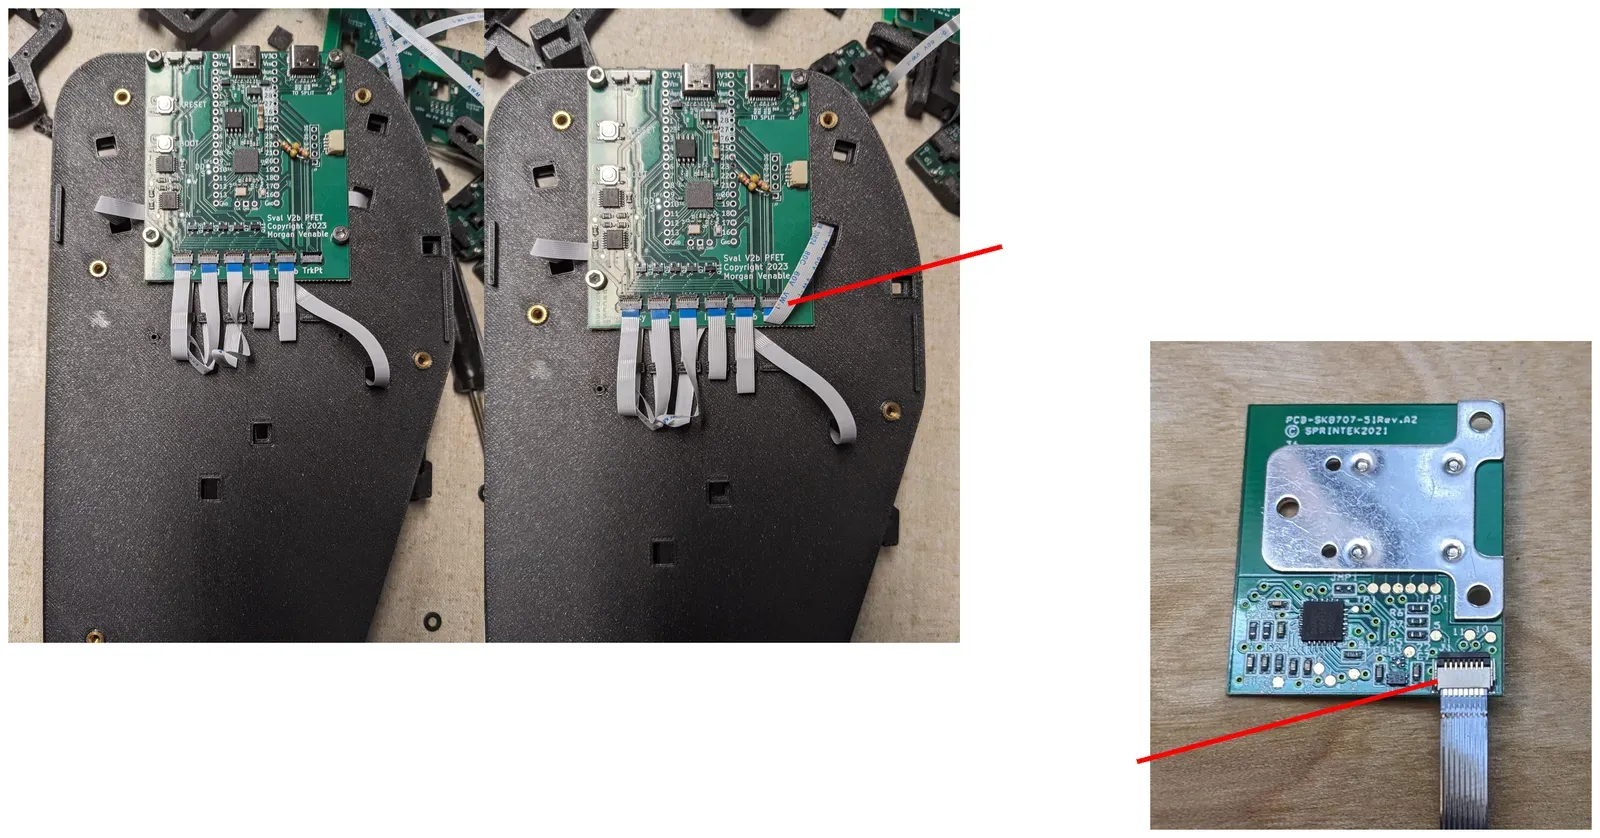
- Every FFC connects to the MCU with the blue stiffener up and the metal contacts down: unlatch, insert, latch.
- On the TrackPoint PCBA end, the FFC connects with the metal contacts up and the blue stiffener down.